Registrarless SIP Account
A registrarless SIP account lets you contact other people on the same local network. Registrarless SIP accounts are not intended for conversations over the public Internet. Instead, they offer specific advantages for local conversations:
- No third-party registrars track your presence or conversations online
- Conversations stay on the local network�no data ventures out to the public Internet
Set up a Registrarless SIP Account
- Obtain your local IP address. For specific instructions see Windows, Mac OS, or Linux. Your local IP address is unique to each computer or device on the local network.
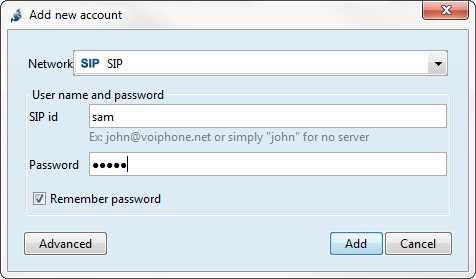
- In Jitsi choose File > Add new account
- From the Network menu choose �SIP�
- Pick and enter a SIP id. The SIP id can be any series of letters or numbers such as
john(do not include an “@” sign for registrarless SIP accounts) - Pick and enter a password
- Click “Add”
Contact another registrarless SIP account
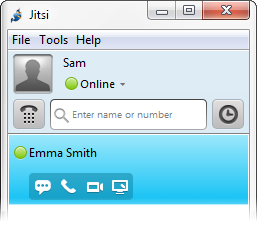
For the sake of demonstration imagine your name is Sam, and you want to contact your friend Emma. Both you and Emma are on the same network, and both of you set up a registrarless SIP account (see instructions above).
| You | Friend |
 |  |
| Name: Sam | Name: Emma |
SIP id: sam | SIP id: emma |
Local IP: 192.168.1.5 | Local IP: 192.168.1.3 |
To add Emma as a contact follow the steps below.
- From the main menu, choose File > Add contact
- From the Select account menu, select “SIP”
- For ID or Number, type:
[email protected]
(Emma’s SIP id goes before the “@” sign, and her local IP address goes after the “@” sign) - For the Display name, type Emma’s full name:
Emma Smith - Click “Add”

You can now select Emma Smith from your contact list to send a message, call, video call, or share your desktop as you would with any other contact.
Troubleshooting
The local firewall needs to be open for registrarless SIP accounts to work. If you use Windows Firewall, see Allow a program to communicate through Windows Firewall. For others, consult your firewall documentation for equivalent instructions.
Jitsi uses ports 5060 and 5061 (UDP) to communicate. To change the specific port numbers Jitsi uses, choose Tools > Options > Advanced. In the left pane, choose “SIP”.