How to configure Eclipse to compile and debug Jitsi
Eclipse is an open source project. Crucially, part of the base code in the IDE is platform-dependent (called the SWT). If you are lucky to run a supported platform (*nix or windows), it is a feature-rich, stable IDE. You can get the latest version from http://www.eclipse.org.
Configure Eclipse for Jitsi (hide)
Prequisites
- At least JDK 1.6
- A recent Eclipse (4.3.1 Kepler SR1 at the time of this writing)
Set up Eclipse
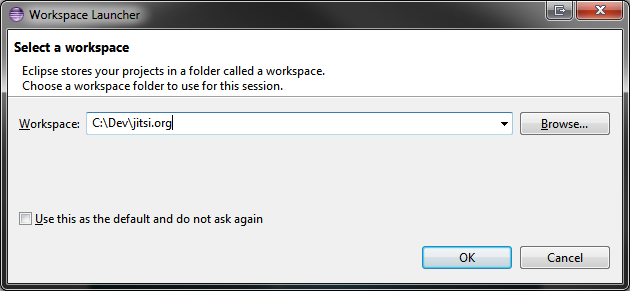
1. Start Eclipse and create a new workspace
2. Close the Welcome page
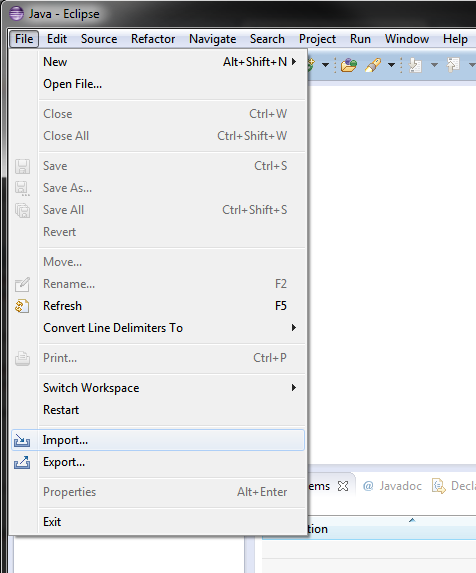
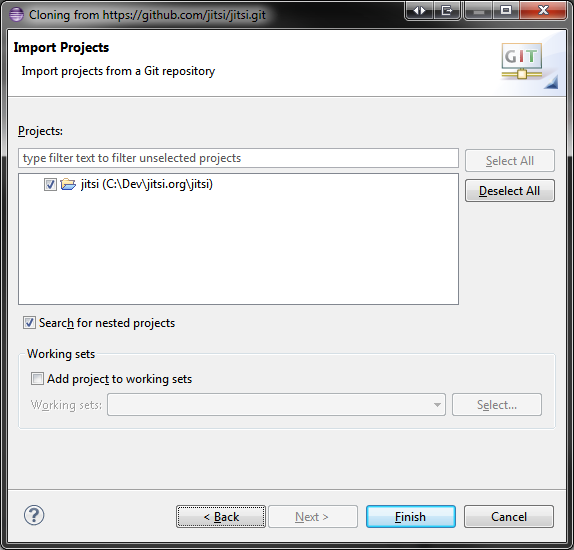
3. Import the Jitsi project by clicking File → Import
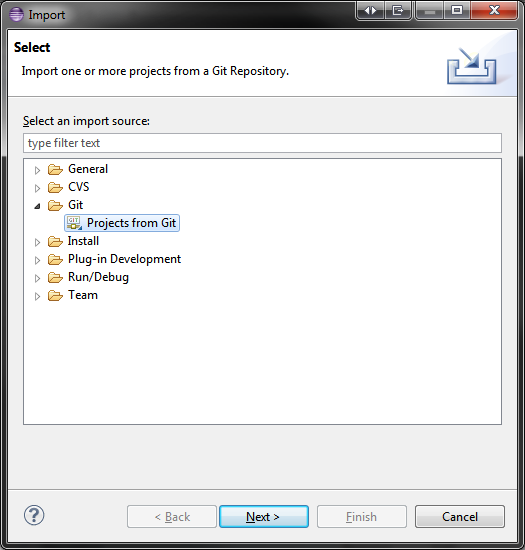
4. Select Projects from Git and click Next
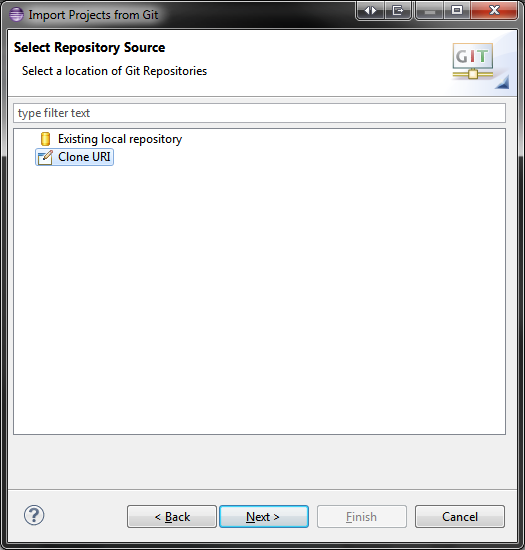
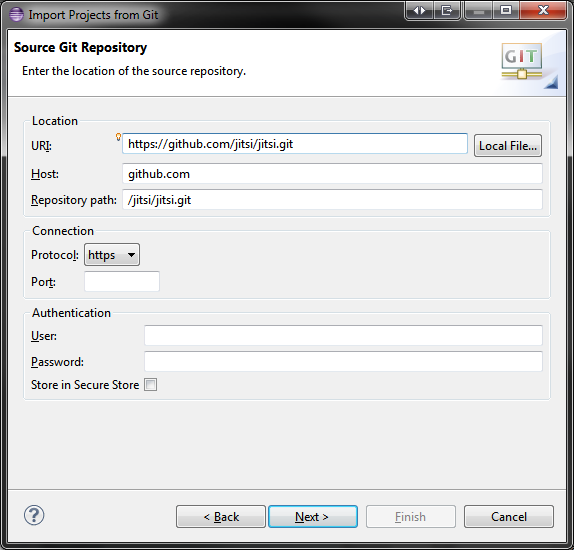
5. Select Clone URI and click Next
6. Enter https://github.com/jitsi/jitsi.git into the field URI and click Next
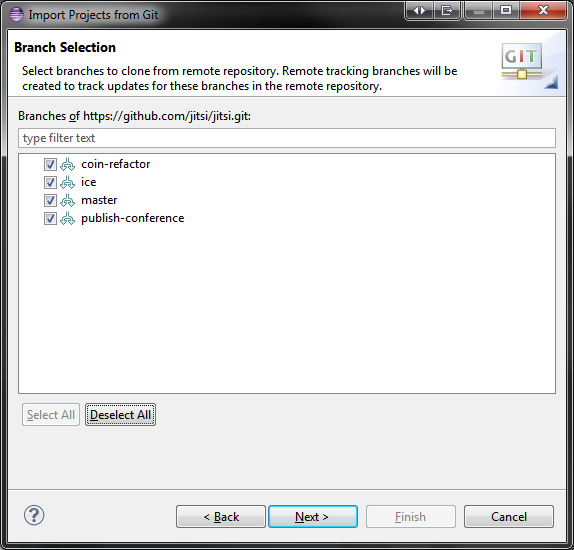
7. Click Next to clone all branches.
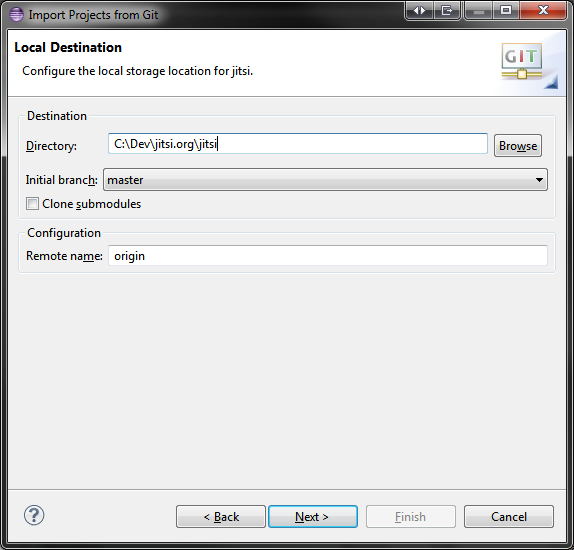
8. Enter the directory where you want to store the project. This should be the directory jitsi directly below the path you used for the workspace in step 1. Click Next and wait until the clone of the repository is completed (this will take a while).
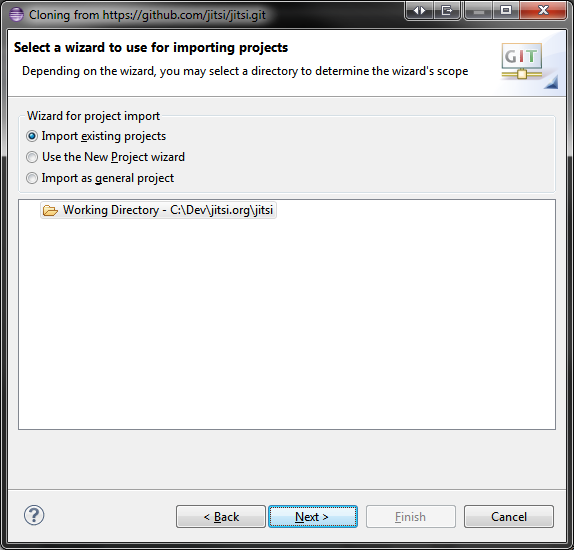
9. Leave the defaults to import existing projects, click Next and then Finish.
Run Ant through Eclipse
Eclipse has an integrated Ant plug-in, which allows you to run all Ant targets within the IDE. You could use this functionality in two ways. You could use the Ant view from (Window→Show view→Ant) to which you can drag-and-drop the build.xml. Or you could use the Outline view to browse the targets just when the build.xml file is open in the editor.
In order to compile the project you need to run the make-and-deploy target. In order to run the project you need the run target.
Configure Run and Debug through Eclipse
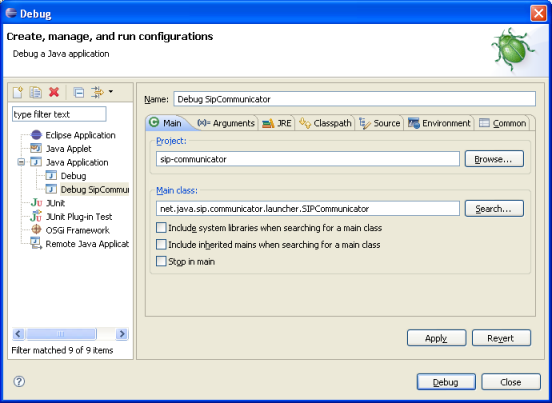
- Open the Run Configuration Window in Eclipse (Menu Run).
- Click the New button to create a new run configuration. In the right panel of the new configuration enter jitsi and
net.java.sip.communicator.launcher.SIPCommunicatoras the projects Main class.
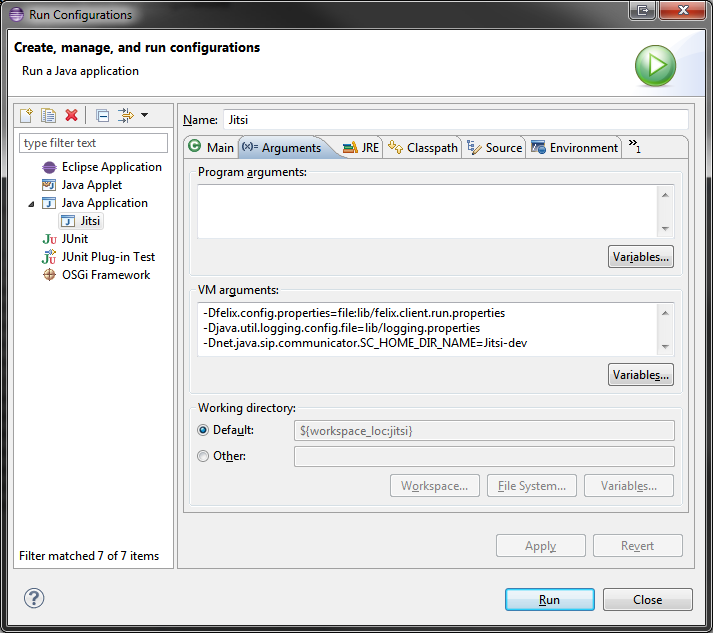
- In the Arguments tab of the configuration, add the following arguments in the section VM Arguments:
-Dfelix.config.properties=file:lib/felix.client.run.properties
-Djava.util.logging.config.file=lib/logging.properties
-Dnet.java.sip.communicator.SC_HOME_DIR_NAME=Jitsi-dev
(The property net.java.sip.communicator.SC_HOME_DIR_NAME is optional, but recommended. It sets the configuration directory to a different one than an eventually installed Jitsi and hence avoids conflicts.)
On linux amd64, additionally add the following:
-Djava.library.path=./lib/native/linux-64
On Mac OS X, additionally add the following properties:
-agentlib:AEGetURLEventHandlerAgent
-Xdock:name='Jitsi'
-Xdock:icon='resources/images/logo/sc_logo_128x128.icns'
-Dapple.laf.useScreenMenuBar=true
If you’re using JDK >= 7, do not add the agentlib:AEGetURLEventHandlerAgent parameter or rename the file extension of lib/native/mac/libAEGetURLEventHandlerAgent.jnilib to .dylib.
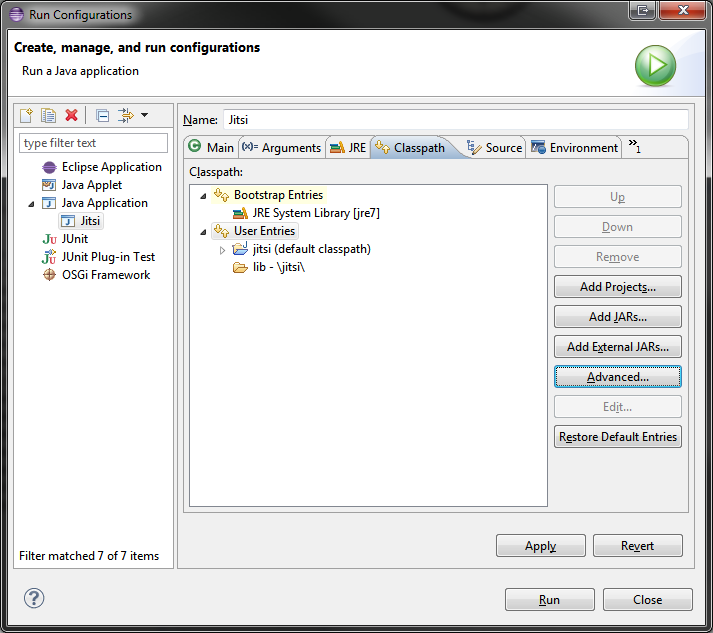
- In the Classpath tab, add the folder
lib- Select the item User Entries
- Click Advanced
- Select Add Folders
- Select jitsi/lib
- Click OK
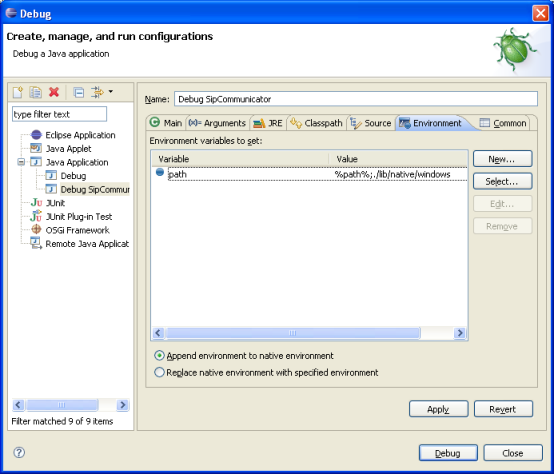
- In the Environment tab, depending on your system, add a new variable and let it point to the system path and additionally to the library path for your system:
- Windows 32bit:
path=%path%;./lib/native/windows - Windows 64bit:
path=%path%;./lib/native/windows-64 - Linux 32bit:
LD_LIBRARY_PATH=$path:./lib/native/linux - Linux 64bit:
LD_LIBRARY_PATH=$path:./lib/native/linux-64 - Mac OS X:
DYLD_LIBRARY_PATH=${workspace_loc}/jitsi/lib/native/mac
- Windows 32bit:
- Note that even when you run or debug the project through Eclipse/Run you have to run the Ant target make-and-deploy before in order to compile it. After the first complete build, the make target is usually enough.
Original Author: Brian Burch
Update: Alexander Pelov
Update: Yana Stamcheva
Update: Thomas Hofer
Update: Ingo Bauersachs